

I love creating super cute treat projects for my children's classmates and Easter is just around the corner! I often create projects around a need and in this case I picked up some Easter Fun Dip Candy pouches at my local grocery store and needed a way to 'cute' them up for my kids to give their friends. The Envelope punch board is of course my go to envelope maker, but also great for making shallow boxes like this one for treat containers! As you can see it nicely fits the Fun Dip pouch and does it with style! So lets get started with the instructions!

Paper Directions:
Bermuda Bay Card Stock 7 1/2" X 7 1/2"
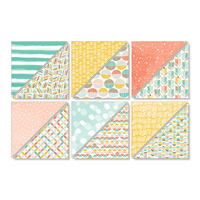
Best Year Ever DSP (Sale-a-Bration) 1" X 12"
Scrap of Bermuda Bay, Calypso Coral and Whisper White
Place your Bermuda Bay card stock on the Envelope Punch Board with the left hand corner lined up with the 3 1/2" mark. Punch and score. Move your paper 1/2" to the left to the 4" line and punch and score again. Now rotate your paper counter-clockwise and line up the punch tail with one of the two score lines. Punch and score again. Move the paper 1/2" in either direction to line up the other score line and punch and score again. Continue to turn the paper in a counter-clockwise direction, punching and scoring as you go until all four sides are complete. Now using the reverse punch, punch all 4 corners, rounding them. Set the Punch Board aside. Now using your Paper Snips, trim off the squares that are created in each of the four corners of your card stock. Burnish all of the score lines (boxes love strong creases!) Now we are going to put the box together. The flap on the left hand side needs to be folded over completely. You should be able to see the 1/2" scored space you created. The right flap should be folded over so that you cannot see the 1/2" scored space, it will be against the table. Using a few Glue Dots on the underside tip of the right flap, push down to adhere it to the left flap. Now when you pop the box up it will be completely even. Using Fast Fuse adhesive or Sticky Strip, apply to strips along the sides of the bottom flap and bring it up to complete your box.
Now for the belly band you will either need a Simply Scored Scoring Tool or Stampin' Trimmer. Score the piece of DSP at 2 1/2", 3", 7 3/8" and 7 7/8". Burnish these score lines carefully. Place your candy inside the box, close the flap and proceed to wrap the DSP around the box with the two end pieces toward the front. Use adhesive to secure to two pieces being sure to do it tight enough that it won't fall off the box, but not so tight you can't slide the belly band off.

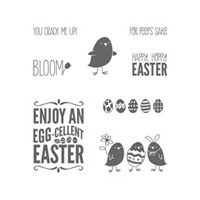
Now for the stamping! Using the Happy, Hoppy Easter sentiment and egg image, stamp a piece of Whisper White Card Stock. Punch the image out with a 2" circle punch. Use the 2 3/8" Scallop Circle Punch for the Bermuda Bay piece and a 2 1/2" Circle Punch for the Calypso Coral piece. Use SNAIL adhesive to adhere the Whisper White layer to the Bermuda Bay and then a Dimensional to adhere that to the Calypso Coral piece. Use SNAIL adhesive on the back of the Calypso Coral circle to adhere it to your belly band and your box is complete!
Visual learner? Me too! Watch the video:
Supply List:


No comments:
Post a Comment